Fabric Mask Instructions
- May 18, 2020
- 2 min read
These have been such hard, sad, and odd times for us all! As the world come to a pause and most of us remain at home, many of us have received a sudden, unexpected gift -- time! What better way to spend that gift than by making gifts for others? I have been spending much of my new time by sewing fabric masks for my family and friends as well as sending them to communities in need.
Masks are an important tool for maintaining our health in the fight against the spread of COVID-19; however, many people are lacking the resources to obtain these simple necessities. Here easy, step-by-step instructions on how to sew a simple fabric mask. If you have access to a sewing machine, you can speed up the process while following the same instructions.
I’d also like to note that I am by no means an expert sewer, feel free to send any tips or advice in response to my instructions in the comments. I'd love to hear your feedback, see your creations, and learn about the people and communities you are sharing your gift with!
Materials:

- One piece of 100% cotton fabric 7 in x 8 in
- One piece of 100% fabric 7 in x 10 in
- For the mask straps, you’ll need either 2 pieces of elastic straps about 12 in. each OR 2 pieces of ribbon or string about 22 in. each
- Sewing thread
- Scissors
- Measuring tape or ruler
- Needle
- Safety pin
- Iron
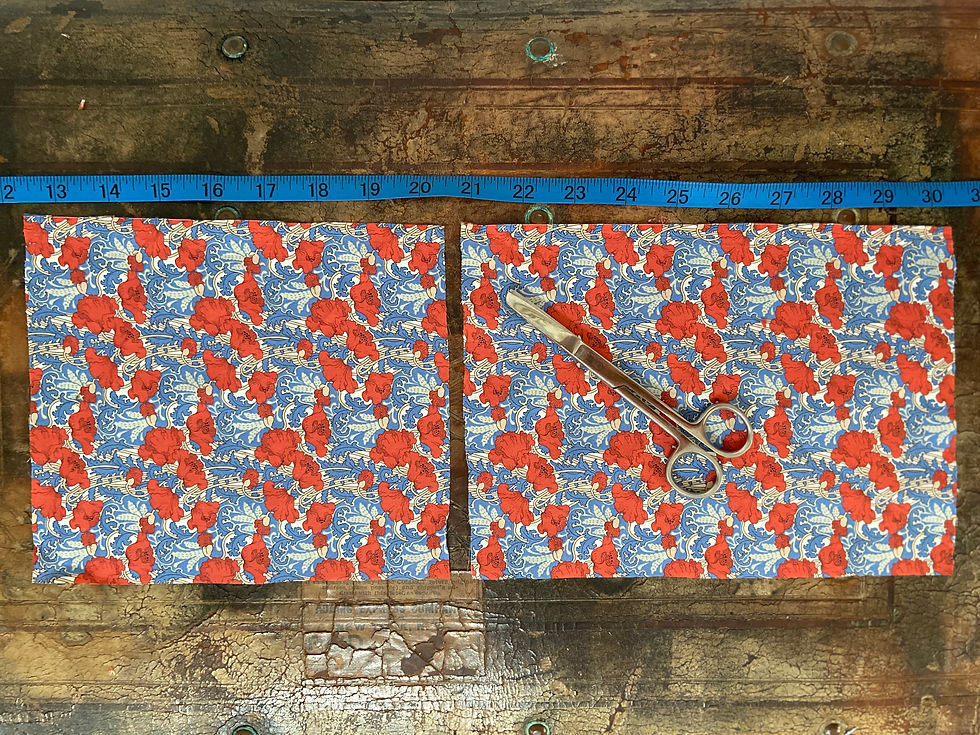
1. Lay out the two pieces of cut fabric. The smaller square will be the inside and the larger square will be the outside of the mask.

2. Place smaller square on top of larger square. Line edges according to image below. If there is an inside and outside to your fabric, be sure to have the inside facing out; once edges are sewn, we will be flipping the fabric around so that the outside is facing out.

3. Using the thread and needle, sew the inside and outside fabric together along top and bottom edges.

4. Flip sewn fabric inside out so that the seams are on the inside

5. Iron the fabric so that it is completely flat.

6. Fold down corner of larger fabric to meet the edge of the smaller fabric and iron flat. Repeat on all four corners.

7. Fold down the edge between the two folded corners on larger fabric and iron flat. Complete on both sides.

8. Fold over longer edges again and iron once more on both sides creating two flaps on either end.

9. Once ironing is finished, sew flap down along its edge on both sides creating a long narrow whole.

10. Attach safety pin to one end of elastic band, ribbon, or string. Insert the safety pin through the whole and out the other end. Repeat on other side.

11. If using elastic bands, tie ends in a knot adjust for size as needed. Synch knot so that it is hidden inside the seam. If using ribbon or string, tie bow on either side and adjust as needed for sizing.

To wear, place the elastic bands, ribbon, or string around your ears so that the fabric covers your mouth and nose.
Enjoy and stay safe healthy!


Comments